TexTools Basics
TexTools allows you to navigate FFXIV's files, export models & textures, and import modded files, either to use ingame or create modpacks for use with Penumbra.
This page will also hold some basic info about FFXIV file structure until I create a more suitable page for it.
Interface Overview
- Penumbra vs. TexTools
- Finding Files
- Shared Models & Racial Scaling
- Texture View
- Model View
- Creating Modpacks
- Other Menus
Penumbra vs. Textools
TexTools seems to be outdated at a glance. Penumbra can run all your mods easier, and doesn't need a game restart to install them! ... This is true, but TexTools is still the only way to create 3D mods with your own custom models, and has a very useful interface for finding the paths of items. Therefore, learning TexTools is still necessary for many mods. If you only want to make 2D mods, the file browser is useful as well.
While Penumbra is a runtime injector, TexTools modifies your files directly, meaning they can sometimes break or cause errors. Penumbra also requires unmodified files in order to run, meaning if you want to use TexTools you're better off copying your game files specifically for TexTools' use.
Finding Files
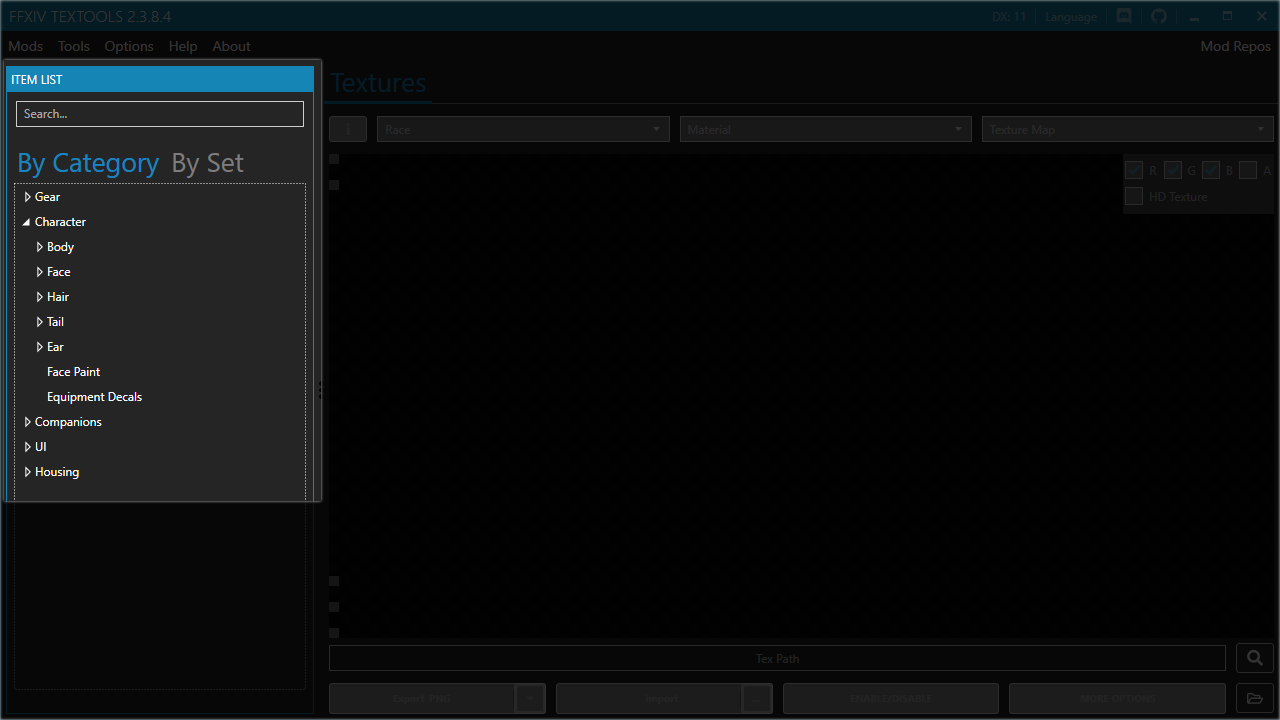
TexTools' left side -- the Item List -- is a file browser for game assets. The default mode, By Category, lists character models and wearable gear items. Other models, such as monsters and miscellaneous game objects, can be found in the By Set category by consulting a spreadsheet I seem to have misplaced (sorry).
While finding a piece of gear is easy via the search function, one of the most unintuitive parts is finding your character's body. These are called SmallClothes and listed in the gear category (Not the "Body" category under "Character")!
Shared Models & Racial Scaling
(Please consult the handy chart in TexTools Reference Information for a visual guide.)
You may have gotten confused on the previous header trying to navigate to your race files on an item. FFXIV makes use of automated racial scaling for most items, meaning essentially that most people are Hyur - with some extra details. These can be easily looked up per-item, but for general rules, here's a list:
- Male Midlander Hyur is often the only texture, and shares models with Elezen, Miqo'te, and Au Ra.
- Male Highlander Hyur have a unique chest model, but otherwise share models with Midlander.
- Female Midlander Hyur shares with every female model except Lalafell.
- Male Roegadyn share with Hrothgar.
- Lalafell share when it makes sense, using Lalafell Male, except for gear that has distinct male and female versions.
In addition, body textures have different sharing rules:
- Male Midlander Hyur share with Elezen and Miqo'te.
- Both Highlander Hyur have unique textures.
- Female Midlander Hyur share with Elezen, Miqo'te, and Female Roegadyn.
- Male Roegadyn have a unique texture.
- Both Lalafell share a body texture.
- Both Au Ra and clans have unique textures(4 diffuses in total!).
- Hrothgar have a unique texture.
- Both Viera have unique textures.
Texture View
For more information on how to use these, please check my Texture Basics guide.
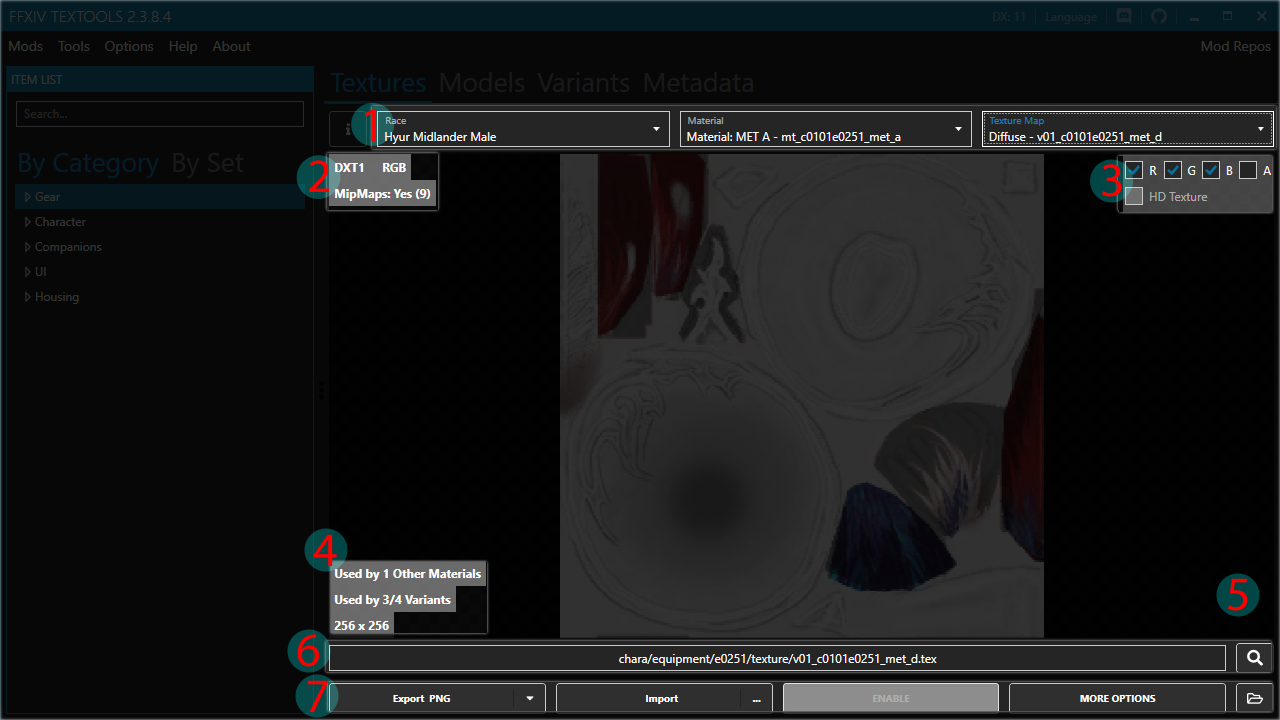
- Navigation of unique materials and textures within an item:
- Race: More relevant for face or body mods; most gear items will use Midlander Male textures. TexTools will inform you of relevant shared files if you try to select a race texture that doesn't exist.
- Material: Different parts of a 3D model can be assigned to use one of these materials (up to 4 maximum materials).
- Texture Map: The individual texture component you're looking at in the preview. Every texture needs to be replaced when a 3D model is replaced.
- Filetype and compression information. TexTools now converts imported PNGs, so manual conversion of your image files to the compatible format is unnecessary.
- Individual channel colour view. This can be useful for inspecting multi maps or finding ColorSet information.
- Shared texture information, and texture resolution (in pixels).
- Mouseover this area to bring up the ViewFinder for texture inspecting shortcuts.
- The texture path. This can be highlighted & copied for use in Penumbra.
- The primary modding/editing options:
- Export the texture (for use in your 2D program). PNG format is easiest.
- Import a texture from a selected file.
- Enable/disable a mod in-game. Must be applied before launching the game.
- The material editor, which can be used to add additional materials, or change the shader of existing materials.
- The folder shortcut opens the exported texture's directory on your computer.
Model View
For more information on how to use these, please check my 3D Basics guide.
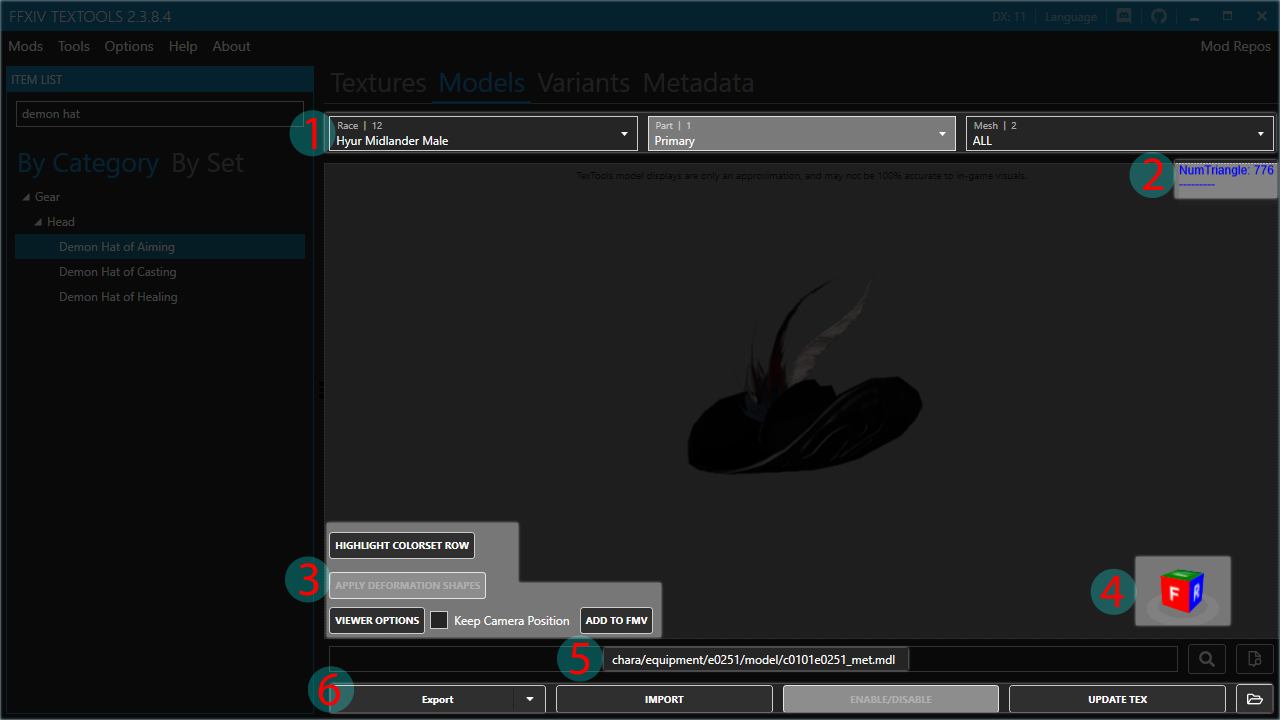
- Navigating unique models within an item:
- Race: Some races have unique models and some don't, depending on the item. See Shared Models.
- Part: Uhh... ignore this. (I'm not sure if it's ever used.)
- Mesh: This shows the mesh parts by number. More info about mesh parts here.
- The model's polycount.
- Bottom left functions:
- Highlight colorset row: This function shows the affected area of a selected row of the colorset applied to the model's texture in white, with the unaffected areas in black.
- Apply Deformation Shapes: Shows selected shape key deformations.
- Viewer Options and Keep Camera Position are optional enhancements to TexTool's 3D viewer. Most of the time, you'll want to view the model in-game for an accurate inspection, so these may not see much use.
- Add to FMV: The Full Model Viewer can be used to export multiple models or complete characters in one go. Handy for rendering or sending your character to other games/programs, or testing animations.
- This cube shows your current viewing angle, and can be clicked to rotate the model to a particular angle of your choice.
- The model's file path. This can be highlighted & copied for use with Penumbra.
- The primary modding & editing options:
- Export the model (for use in your 3D program). FBX is easiest.
- Import: 3D models will automatically import the same file name & directory of the original FBX export. See 3D Import Menu for more.
- Enable/disable a mod in-game. Must be applied before launching the game.
- Update Tex refreshes any recently-imported textures to display on the 3D model.
- The folder shortcut opens the exported model's directory on your computer.
3D Import Menu
Most of these options have adequate descriptions when moused over.
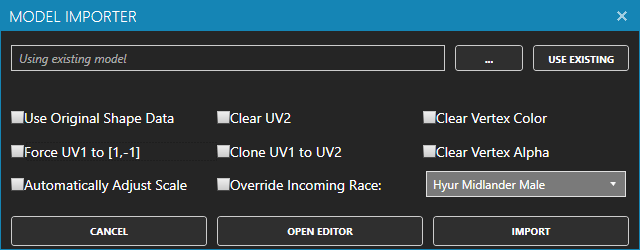
- The box at the top can be used to navigate to a particular 3D file.
- Use Original Shape Data will attempt to find SE's unedited shape keys on your mesh. This should generally never be turned on(even for faces) since you can assign your own shape keys as desired.
- Force UV1 to [1,-1] moves and scales all your UVs into the top left of your UV map. This can either have disastrous results, or do nothing at all depending on your UV layout.
- Override Incoming Race allows you to import the model on top of the chosen race instead of what you had selected.
And with that step complete, you can press "Open Editor" to bring up the Advanced Import Menu, essential for importing many items:
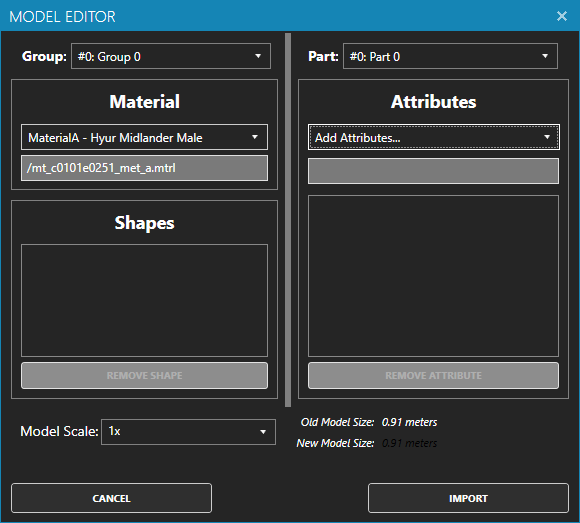
- Group refers to meshes with a matching whole number (eg. part 1.0 and 1.1 are in Group 1)...
- ...while Part refers to the individual meshes within a group. (More information on meshes here)
- Material can be assigned per-group.
- Different Attributes are available depending on the model you're importing, and can be set per part. For more info on attributes, please see my Metadata guide.
- Shapes (Shape Keys) will be found automatically by TexTools and show up in the Shapes window, provided they've been named correctly.
- Model Scale is... probably don't touch it. I still remember my friend's 200-metre tall flying naked torso.
Creating Modpacks
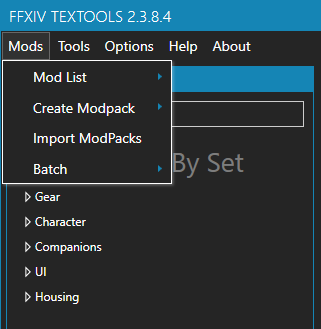
- Mod List view shows all your currently active modifications in TexTools and allows you to enable, disable, or delete them individually.
- Create Modpack:
- Import Modpack
- Batch operations allow you to quickly enable or disable every mod.
Other Menus
TBA.